
If you have recently started learning Linux, one of the first things you will notice is how much work can be done through the terminal.
Unlike Windows, where many tasks are performed using graphical interfaces, Linux provides powerful command-line tools that allow you to navigate directories, create files, manage applications, inspect system information, and troubleshoot problems.
At first, the terminal might look intimidating. You see a black screen, a blinking cursor, and commands that seem unfamiliar.
But here’s the good news: you don’t need to be a Linux expert to get started. Learning a handful of essential commands can make a significant difference in how confidently you use Linux.
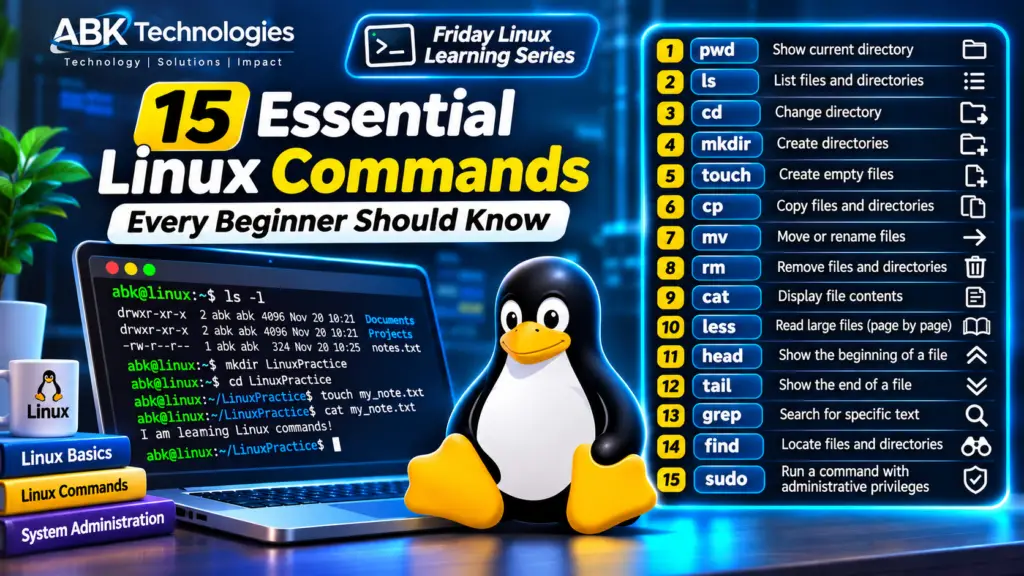
In this guide, we’ll explore 15 Linux commands every beginner should know, with practical examples you can try on your own computer.
Whether you’re an IT student, aspiring system administrator, software developer, cybersecurity enthusiast, or someone exploring Linux for the first time, this tutorial will give you a solid foundation.
1. pwd – Find Out Where You Are
Have you ever opened a terminal and wondered which directory you’re currently working in?
That’s exactly what pwd helps you determine.
The command stands for Print Working Directory.
It displays the full path of your current location in the Linux file system.
Example:
pwdPossible output:
/home/johnThis tells you that your current working directory is /home/john.
When should you use it?
- When you are unsure of your current location.
- Before creating or deleting files.
- When navigating complex directory structures.
- When working with scripts that depend on specific paths.
Think of pwd as your location indicator inside Linux.
2. ls – List Files and Directories
The ls command displays files and directories in your current location.
Example:
lsPossible output:
Documents Downloads Music Pictures VideosYou can also use additional options to display more information.
Show detailed information:
ls -lThis displays file permissions, ownership, file sizes, and modification dates.
Show hidden files:
ls -aIn Linux, hidden filenames generally begin with a dot (.).
Combine both options:
ls -laThis is particularly useful when inspecting configuration files and directories.
3. cd – Change Directory
The cd command allows you to move from one directory to another.
It stands for Change Directory.
For example, to enter your Documents directory:
cd DocumentsTo move into another directory using its full path:
cd /var/logOther useful examples include:
Go back one directory:
cd ..Return to your home directory:
cd ~Return to your previous directory:
cd -If you are learning Linux, cd is one of the commands you will use most frequently.
4. mkdir – Create Directories
Need to create a new folder? Use mkdir.
The command stands for Make Directory.
For example:
mkdir LinuxProjectsThis creates a directory named LinuxProjects in your current location.
You can also create several directories at once:
mkdir Documents Projects BackupsTo create nested directories, use:
mkdir -p Projects/Linux/BeginnersThe -p option creates missing parent directories as necessary.
Practical application: You can use mkdir to organize your programming projects, documents, backups, and other files.
5. touch – Create Empty Files
The touch command is commonly used to create empty files.
For example:
touch notes.txtThis creates an empty file called notes.txt if it does not already exist.
You can also create multiple files:
touch file1.txt file2.txt file3.txtAn interesting detail is that touch can also update the timestamps of existing files without changing their contents.
When should you use it?
- Creating a new text file.
- Preparing a project structure.
- Creating placeholder files.
- Updating file timestamps.
6. cp – Copy Files and Directories
The cp command allows you to copy files and directories.
Suppose you have a file called notes.txt and want to create another copy.
cp notes.txt notes_backup.txtThis creates a duplicate called notes_backup.txt.
You can also copy a file into another directory:
cp notes.txt Documents/To copy an entire directory and its contents, use the recursive option:
cp -r LinuxProjects LinuxProjects_BackupImportant: Always check your destination before copying files, especially when working with important system data.
7. mv – Move or Rename Files
The mv command is used to move files and directories from one location to another. It can also rename them.
Rename a file:
mv notes.txt linux_notes.txtMove a file into another directory:
mv linux_notes.txt Documents/Move and rename a file simultaneously:
mv notes.txt Documents/linux_notes.txtUnlike copying, moving a file normally removes it from its original location.
This command is useful when organizing files and managing project directories.
8. rm – Remove Files and Directories
The rm command removes files and directories.
For example:
rm notes.txtThis deletes the file named notes.txt.
To remove an empty directory, you can use:
rmdir OldFolderTo remove a directory and its contents recursively:
rm -r OldFolderImportant security warning:
Be extremely careful when using rm, particularly with administrative privileges.
Unlike a typical graphical file manager, command-line deletion generally does not move files into a recycle bin.
Before executing a deletion command, verify the filename and directory.
Avoid experimenting with destructive commands on important system directories.
9. cat – Display File Contents
The cat command allows you to display the contents of a file directly in the terminal.
For example:
cat notes.txtThe terminal displays the contents of notes.txt.
You can also display multiple files:
cat file1.txt file2.txtAnother useful application is combining files:
cat file1.txt file2.txt > combined.txtThis writes the contents of both files into combined.txt, replacing its previous contents if it already exists.
Be careful when using output redirection (>), because it can overwrite existing data.
10. less – Read Large Files
What happens when you need to read a file containing hundreds or thousands of lines?
Using cat might flood your terminal with too much information.
This is where less becomes useful.
Example:
less /var/log/syslogThis opens the file in a scrollable viewer, where you can move through its contents without displaying everything at once.
Useful keyboard shortcuts include:
Space– Move forward one screen.b– Move backward one screen./word– Search for a word.n– Find the next search result.q– Exit the viewer.
Practical application: System administrators frequently use tools like less to inspect log files and configuration files.
11. head – Display the Beginning of a File
The head command displays the first few lines of a file.
By default, it displays the first 10 lines.
Example:
head notes.txtTo display only the first five lines:
head -n 5 notes.txtThis is useful when you want to quickly inspect the beginning of a file without opening the entire document.
For example, developers can use it to inspect the beginning of configuration files or datasets.
12. tail – Display the End of a File
The tail command does the opposite of head.
It displays the last few lines of a file.
Example:
tail notes.txtTo display the last five lines:
tail -n 5 notes.txtOne particularly useful option is -f.
tail -f /var/log/syslogThis allows you to monitor new lines being added to a log file in real time.
To stop monitoring, press Ctrl + C.
Why is this important?
When troubleshooting a Linux server, you may need to monitor logs while an application or service is running. tail -f makes this possible.
13. grep – Search for Specific Text
The grep command helps you search for specific words or patterns inside files.
Suppose you have a file containing several lines of information and want to find every line containing the word error.
Use:
grep "error" application.logYou can also perform a case-insensitive search:
grep -i "error" application.logTo display line numbers alongside matching results:
grep -n "error" application.logTo search recursively through files in a directory:
grep -r "error" /var/log/Practical application:
grep is particularly useful for troubleshooting applications, searching logs, inspecting configuration files, and identifying specific information within large collections of files.
14. find – Locate Files and Directories
Sometimes you know the name of a file but have no idea where it is stored.
The find command helps you locate files and directories based on different conditions.
For example, to find a file called notes.txt inside your home directory:
find ~ -name "notes.txt"To find all PDF files:
find ~ -name "*.pdf"To find directories with a particular name:
find /home -type d -name "Projects"You can also search for files modified within the last seven days:
find ~ -type f -mtime -7Practical application: System administrators and developers use find to locate files, identify old data, and manage large directory structures.
15. sudo – Execute Commands with Administrative Privileges
The final command is one of the most important tools in Linux administration.
sudo allows an authorized user to execute a command with elevated privileges, according to the system’s security policy.
For example, updating package information on an Ubuntu or Debian-based system:
sudo apt updateYou may be prompted to enter your password.
Another example:
sudo systemctl restart sshThis attempts to restart the SSH service, assuming the service exists and your account has the necessary privileges.
Why is sudo important?
Linux separates ordinary user privileges from administrative privileges to improve system security.
Instead of operating as the root user all the time, administrators can use sudo when elevated permissions are necessary.
Important: Never use sudo blindly. Always understand what a command does before executing it with administrative privileges.
16. Put Your Knowledge into Practice: A Simple Linux Exercise
Reading about Linux commands is useful, but practising them is how you become confident.
Let’s combine several of the commands you’ve just learned.
Imagine you want to create a small project directory containing a text file.
Follow these steps.
Step 1: Check your current location
pwdStep 2: Create a project directory
mkdir LinuxPracticeStep 3: Enter the directory
cd LinuxPracticeStep 4: Create a text file
touch my_first_linux_note.txtStep 5: Add some information to the file
echo "I am learning Linux commands!" > my_first_linux_note.txtStep 6: Display the file contents
cat my_first_linux_note.txtExpected output:
I am learning Linux commands!Step 7: Create a backup
cp my_first_linux_note.txt backup.txtStep 8: List your files
ls -lYou should now see two files:
my_first_linux_note.txtbackup.txt
Congratulations! You have just created a directory, navigated into it, created a file, added information, displayed its contents, copied it, and listed the results.
You’ve completed a basic Linux file management exercise using the terminal.
17. A Quick Linux Commands Reference
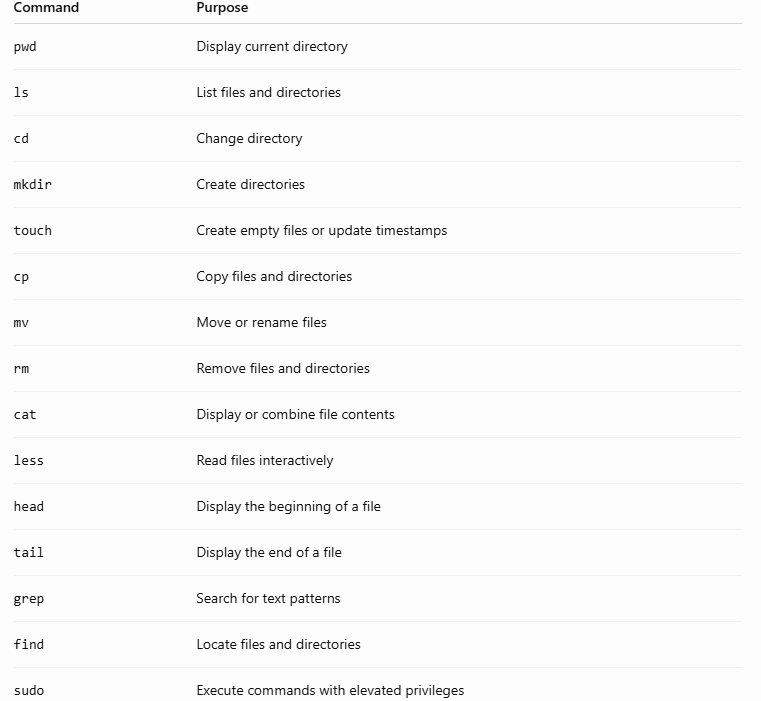
Here is a summary you can save and refer to whenever you need it.
Conclusion
Linux might seem complicated when you first start using it, but the terminal becomes much easier to understand once you become familiar with its essential commands.
The 15 commands covered in this article provide a foundation for navigating directories, managing files, searching for information, reading logs, and performing administrative tasks.
However, don’t just read these commands and move on. Open a Linux terminal, create a practice directory, and try them yourself.
If you don’t have Linux installed on your computer, you can explore Linux using a virtual machine or Windows Subsystem for Linux (WSL).
Remember, becoming comfortable with Linux takes practice. You don’t need to master every command immediately. Start with a few, use them regularly, and gradually build your skills.
In our next Friday Linux Learning Series article, we’ll explore Linux file permissions and ownership, helping you understand how Linux controls who can read, write, and execute files.
Keep learning. Keep practising. Keep building.
Related articles
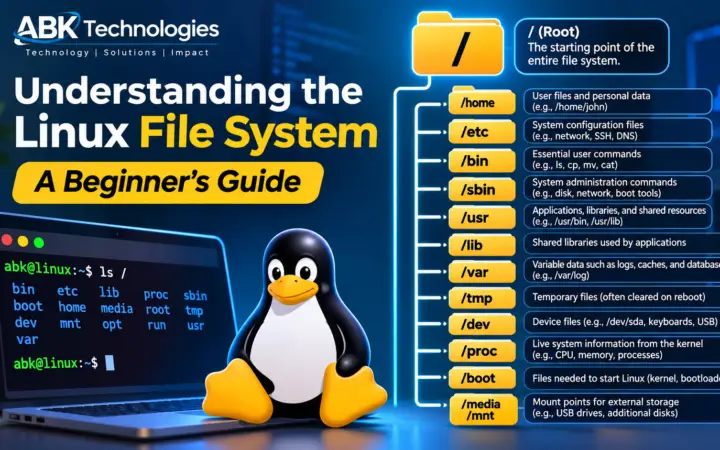
Understanding the Linux File System: A Beginner’s Guide to Linux Directories
Have you ever opened a Linux terminal and wondered why everything starts with a single slash (/)? Where is the C: drive? What do…
Read article
El Niño Is Coming: How IT and Technical Departments in Ghana Should Prepare for the 2026–2027 Climate Event
Power outages, extreme heat, flooding, water shortages and infrastructure disruptions could test the resilience of organisations across Ghana. Is your IT department prepared? Climate…
Read article
How Does a 1 GB Folder Become a 400 MB ZIP File? The Science Behind Data Compression
Imagine you have a folder containing 1 GB of photos, documents, videos, or other files. You compress it into a ZIP archive, and suddenly…
Read article← Python Automation 2026 — Part 3: Web Automation with Python: APIs, Forms, and Browser Workflows
Leave a comment